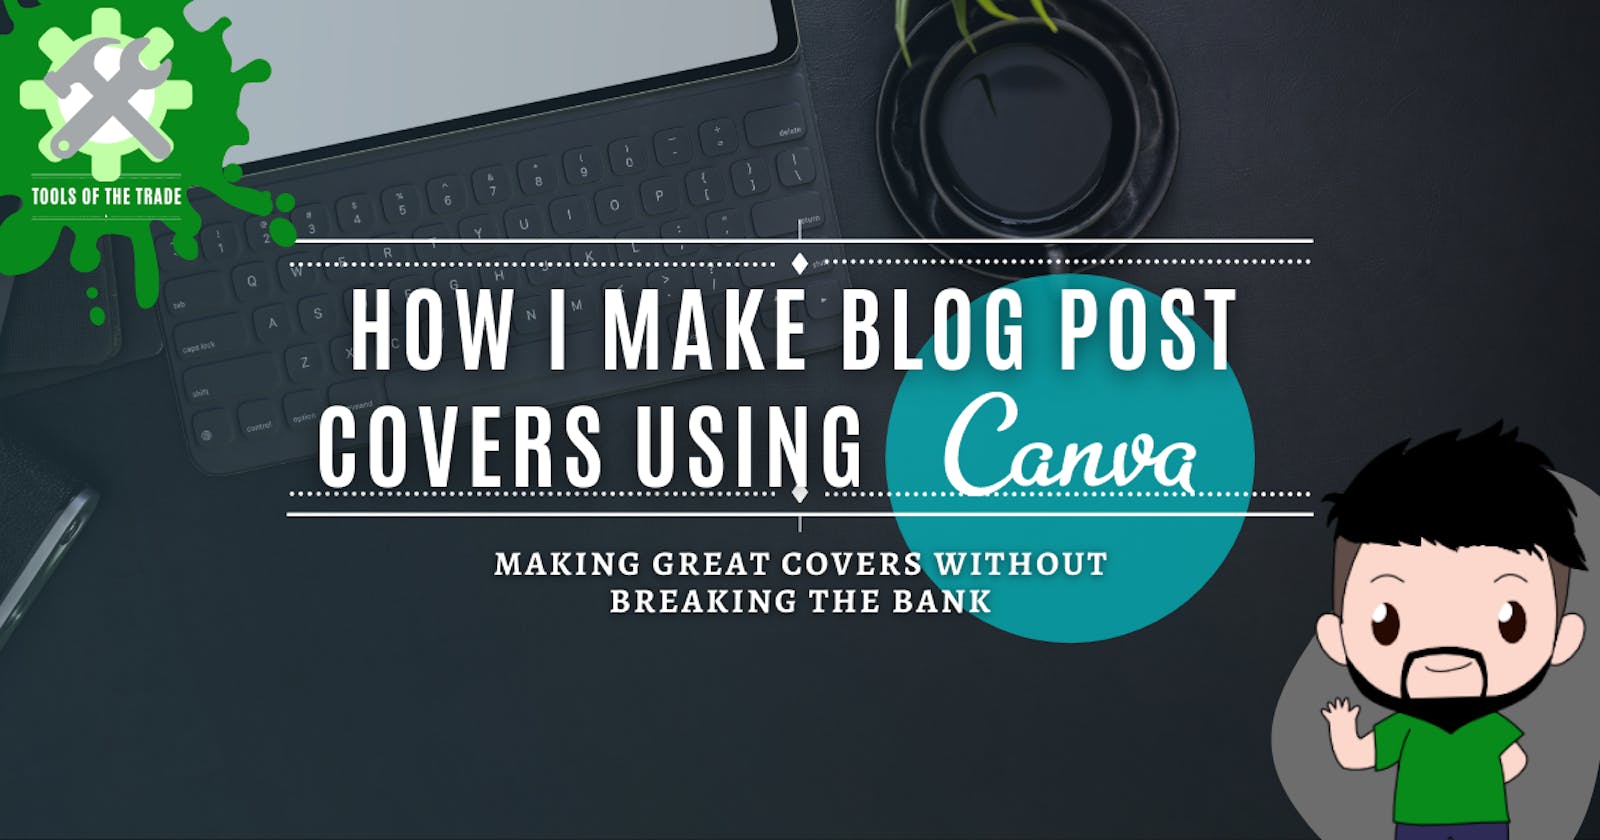
How To Make a Cover for your Blog post using Canva
Making Great Designs Without Breaking the Bank.
Last year our offices closed and we were assigned to work from home. And being stuck at home our managers needed materials to post so that they could advertise their business.
Due to our office having a tight budget, and me not having the skills to merit a subscription to the adobe creative suite, we had to find an alternative.
That's when we found Canva.com
Canva is an easy-to-use graphic design platform, used to create social media graphics, presentations, posters, documents, and other visual content.
I used Canva to create several posters, certificates, and presentations.
And today, I'll share with you guys today how I make my cover for my blog posts.
STEP 1: Create a new Design
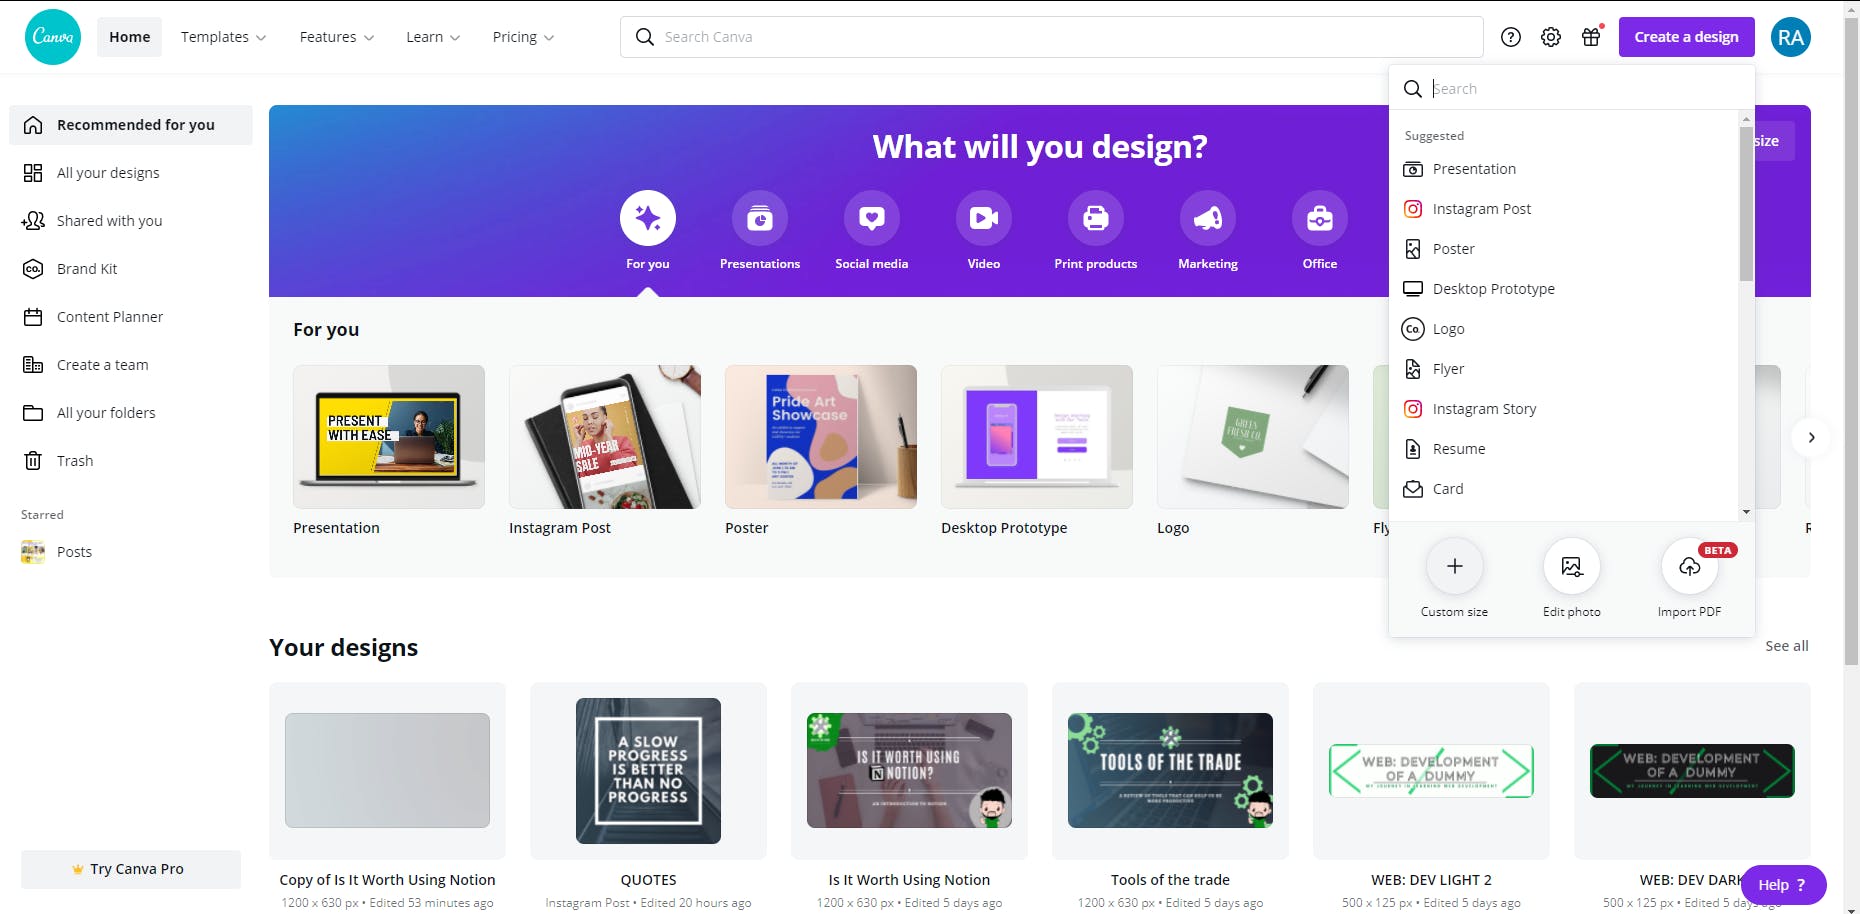
Click the "Create a new Design" Button located at the top-right of the screen.
Once you click that, there are several templates depending on what you want to create or where you want to post your design.
I use the Custom Size layout and set the width and height to 1200px and 630px respectively.
STEP 2: Pick a template
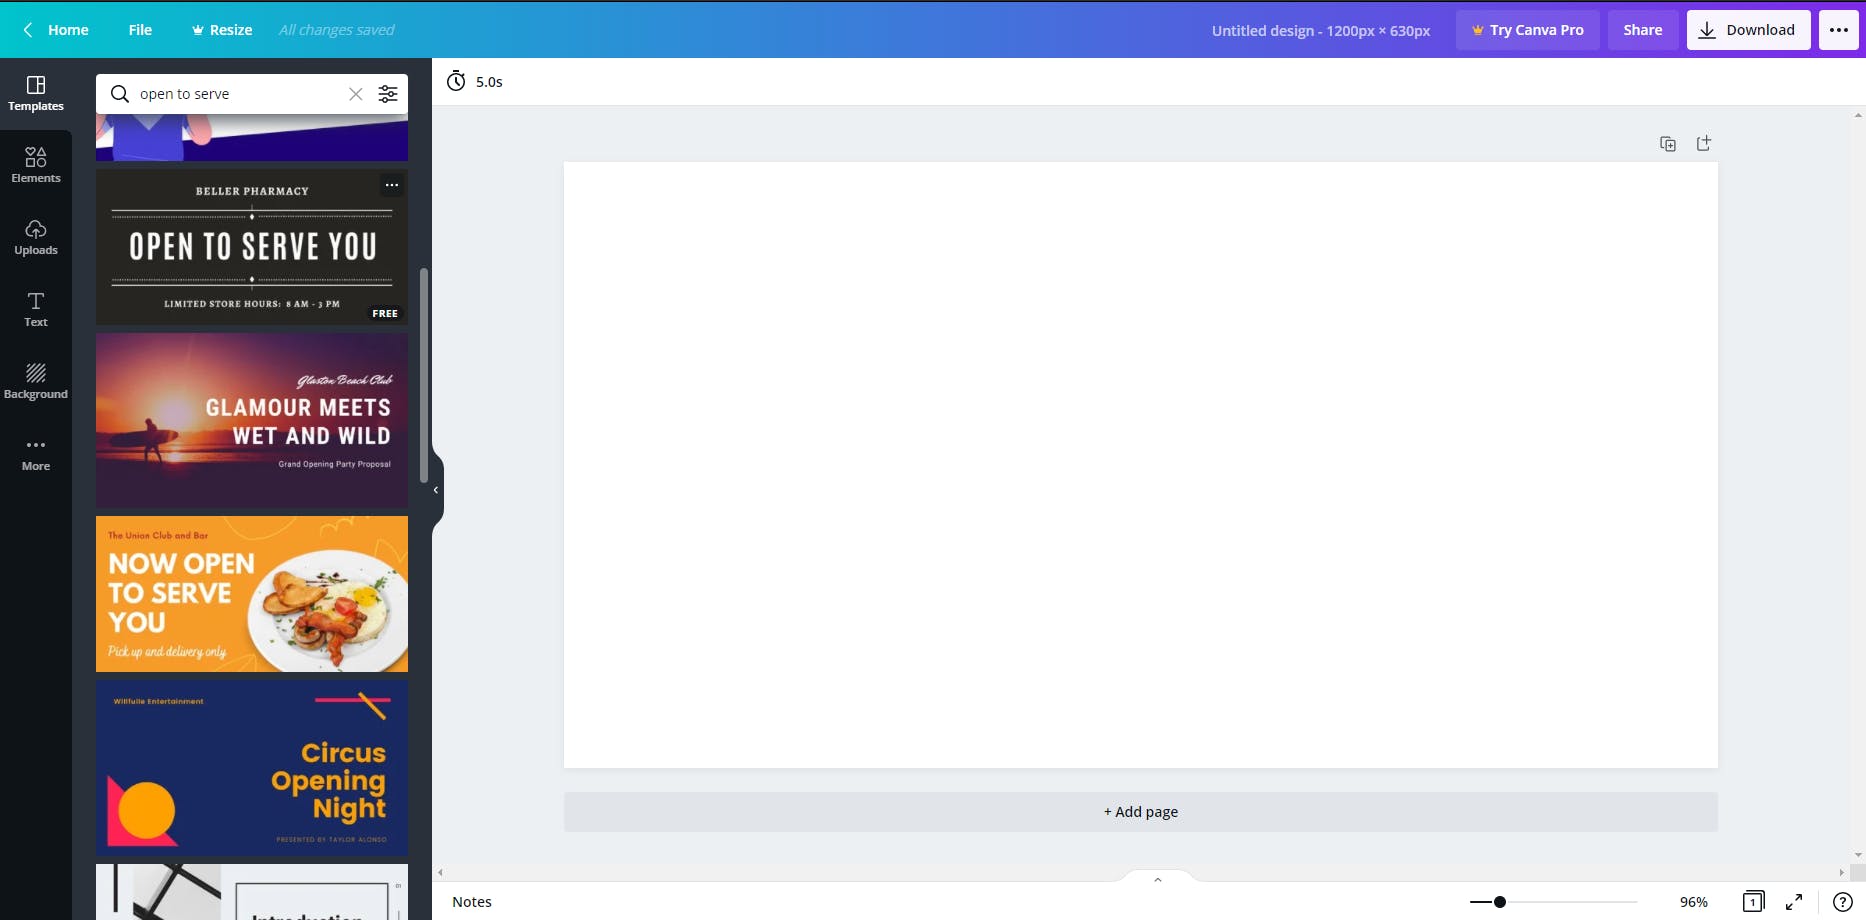
Canva has a large library of templates available that you can use for your designs.
You can choose or search for a template by clicking the templates tab located on the left side of the new design.
Here you can search for specific templates and Canva would offer you suggestions on what best fits your search.
I chose the one with the title "OPEN TO SERVE YOU"
STEP 3: Enter Your Blog Post Title
Change the current title to the title of your blog post.
Change the font, font size, and font style accordingly.
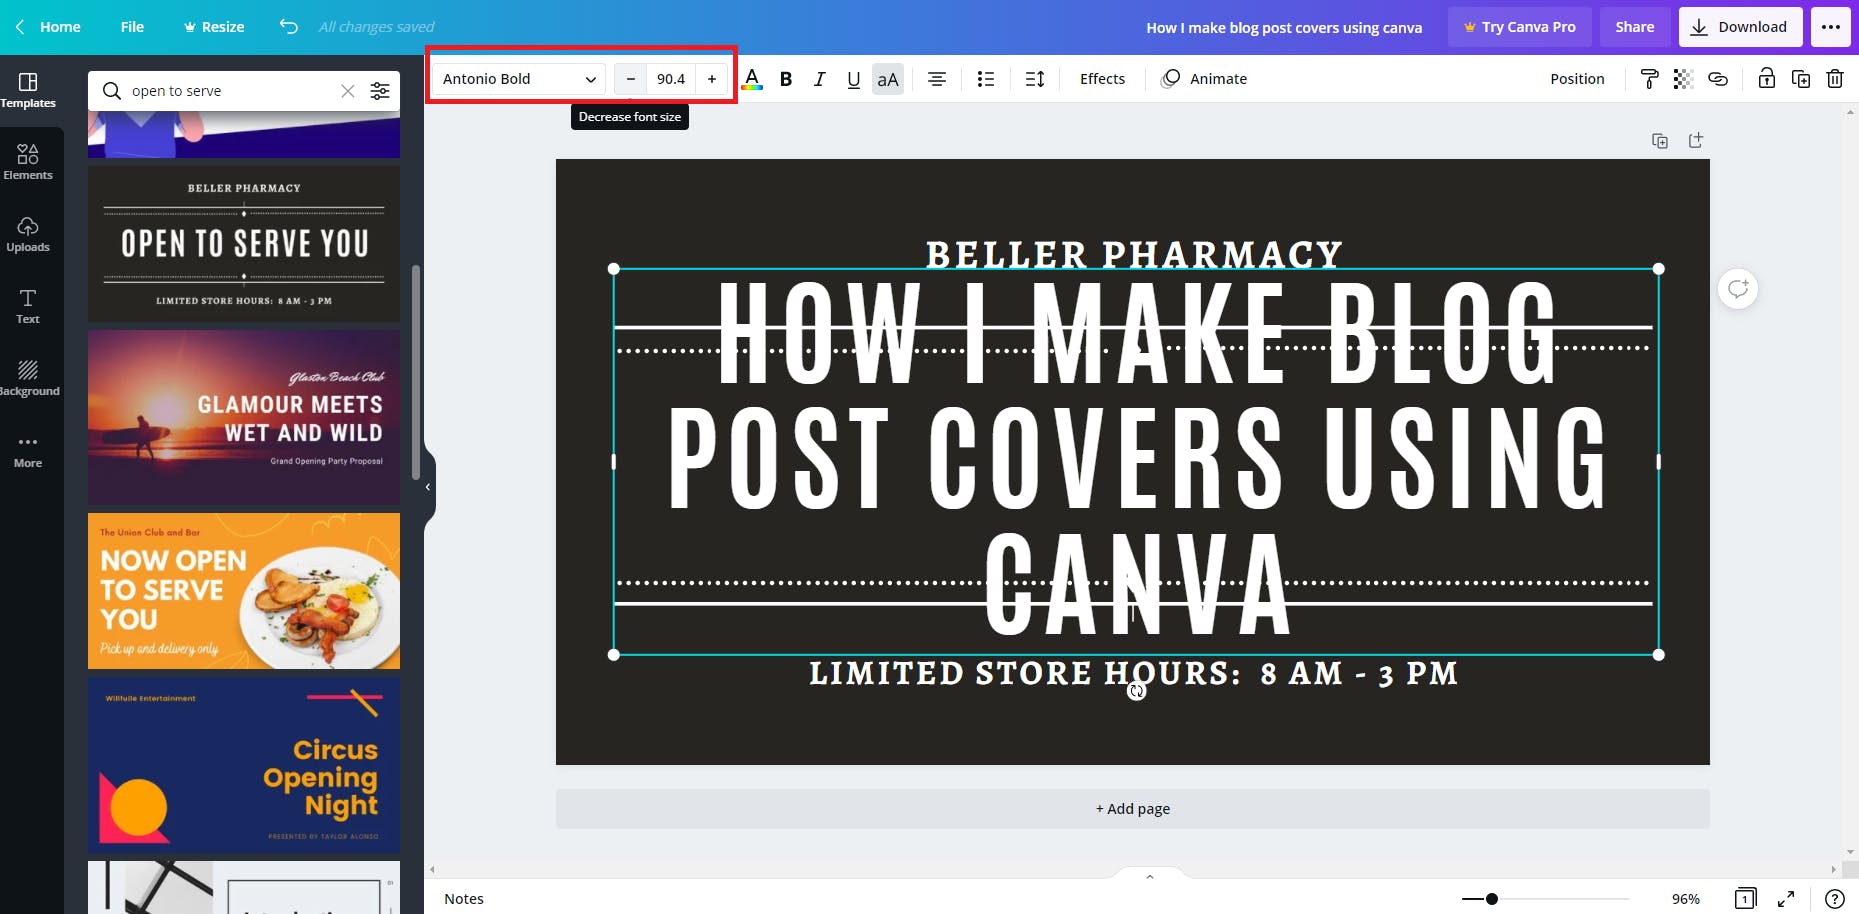
You can change the font and font size using the Font Panel highlighted above.
STEP 4: Choose a Background
To choose your desired background you can use the Background tab and search one from there.
I on the other hand use the elements tab instead. I choose a photograph I like and set it as my background.
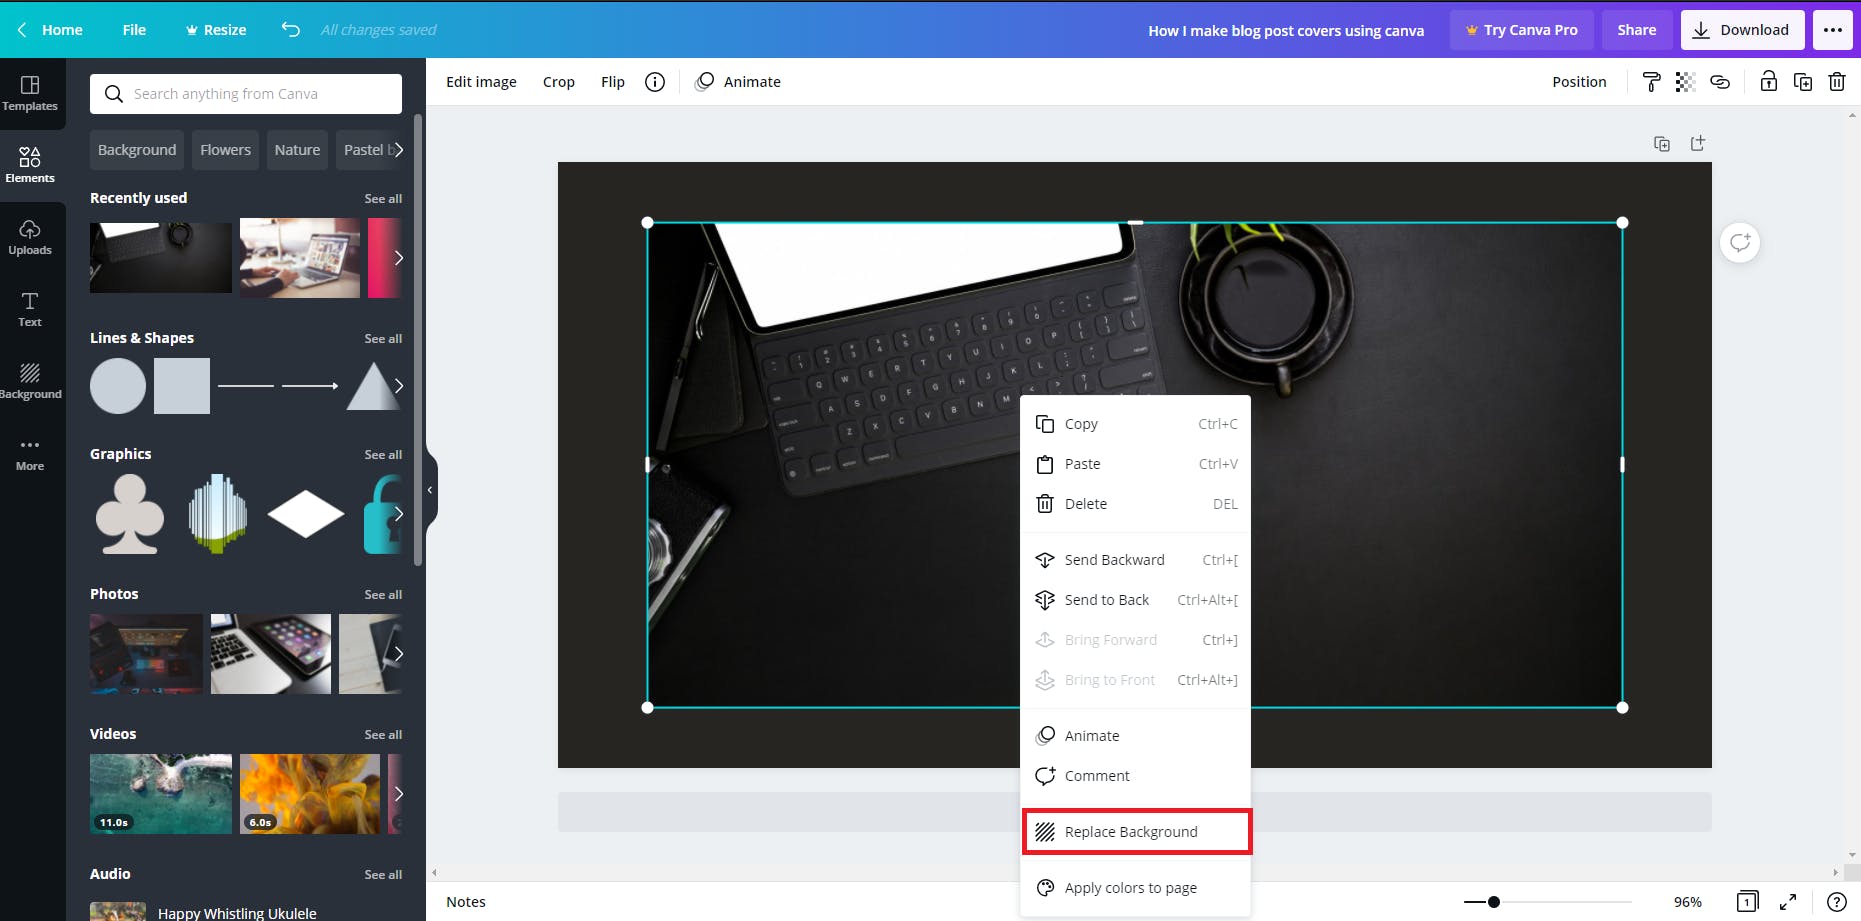
To do that just click on the image you like. It will be pasted on top of your design. Right-click it and click the replace background option on the popup.
STEP 5: Add a gradient
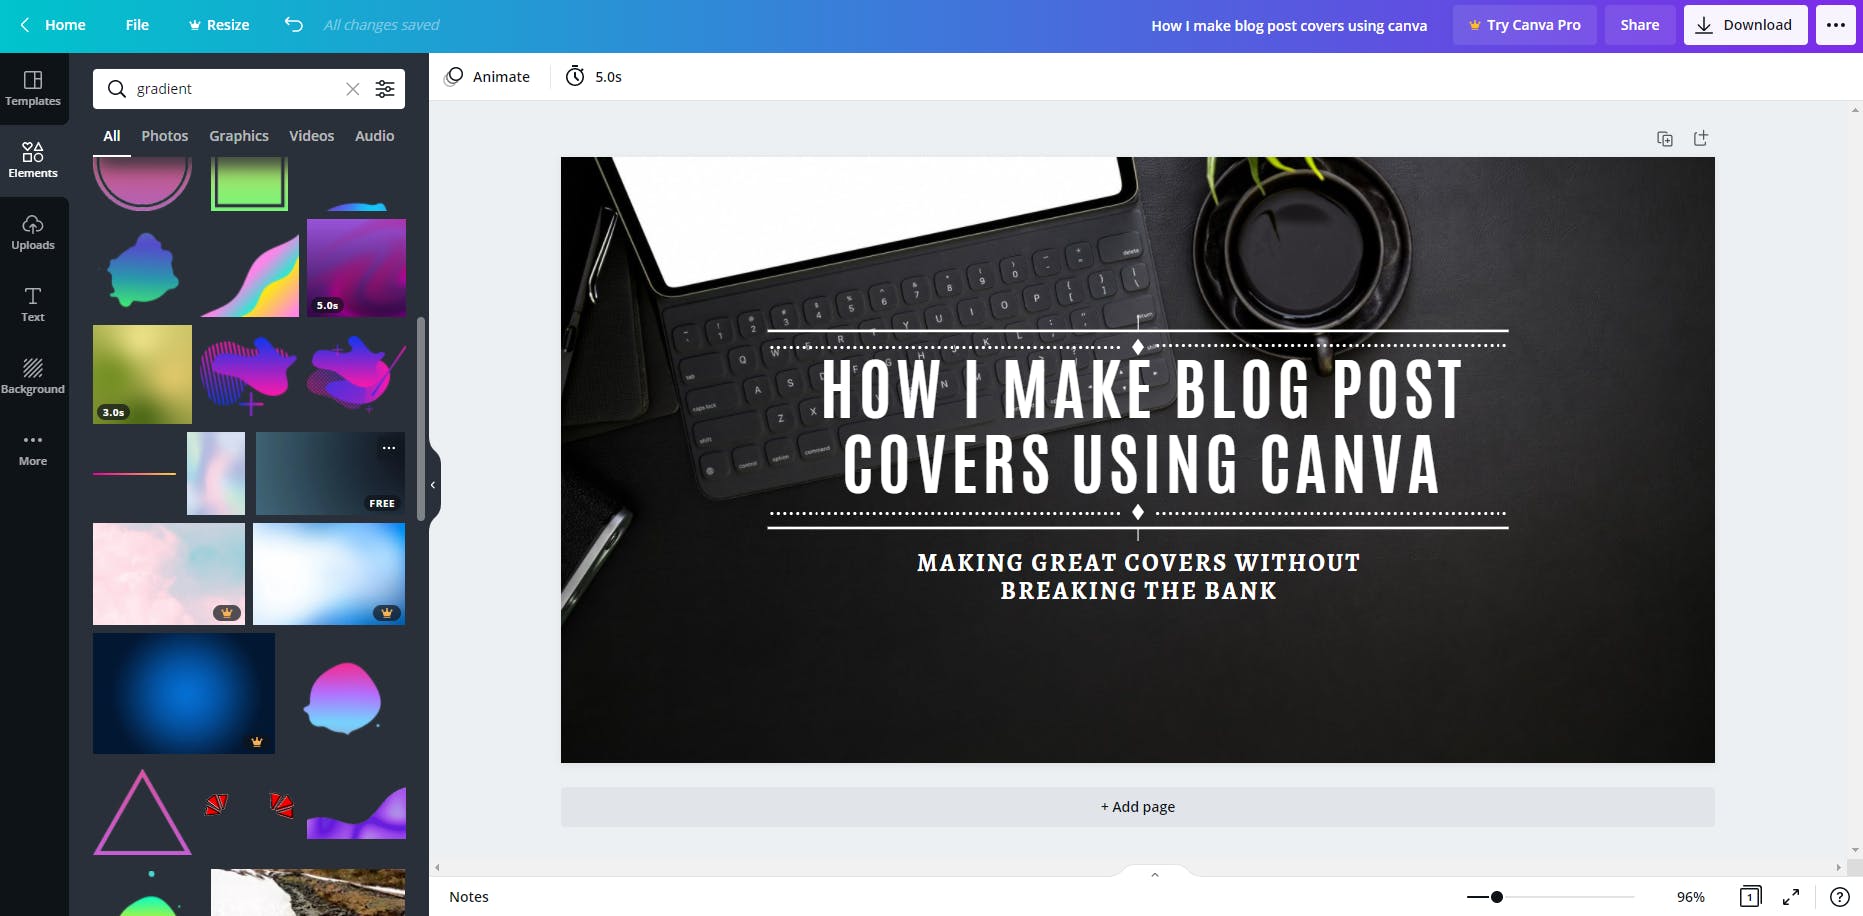
As you can see above I already have a cover I can use. But for me, it still feels incomplete. I feel that the text is clashing with the background image.
So I go to the elements tab and search for "gradient".
I chose the grey to black one and set the height and width to be the same size or larger than the design itself.
Then I set the transparency to a low number so that the background image would still show.
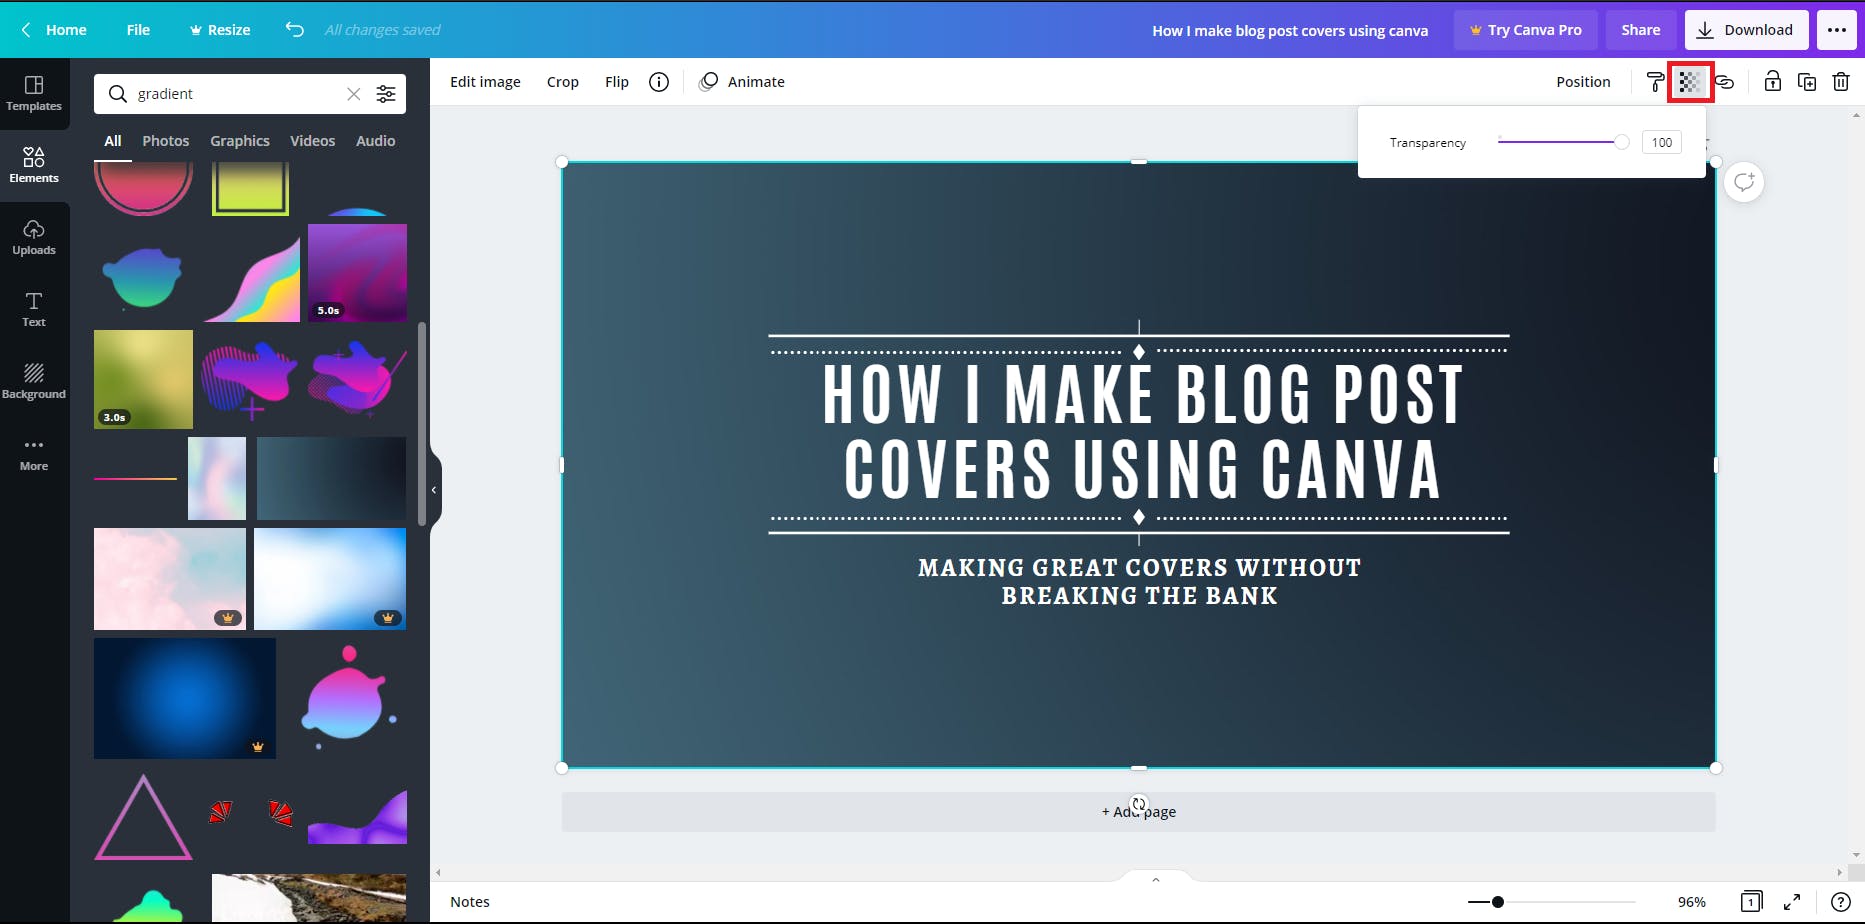
To set the transparency click the checkboard button located on the image setting panel highlighted above.
I set mine to 43.
STEP 6: Add extra elements
In my designs, I usually add elements to the corners.
If you found your desired element click on it so that the element will be pasted on top of your design. In this example, I used a blob and a blot.
I then change the colors to my liking.
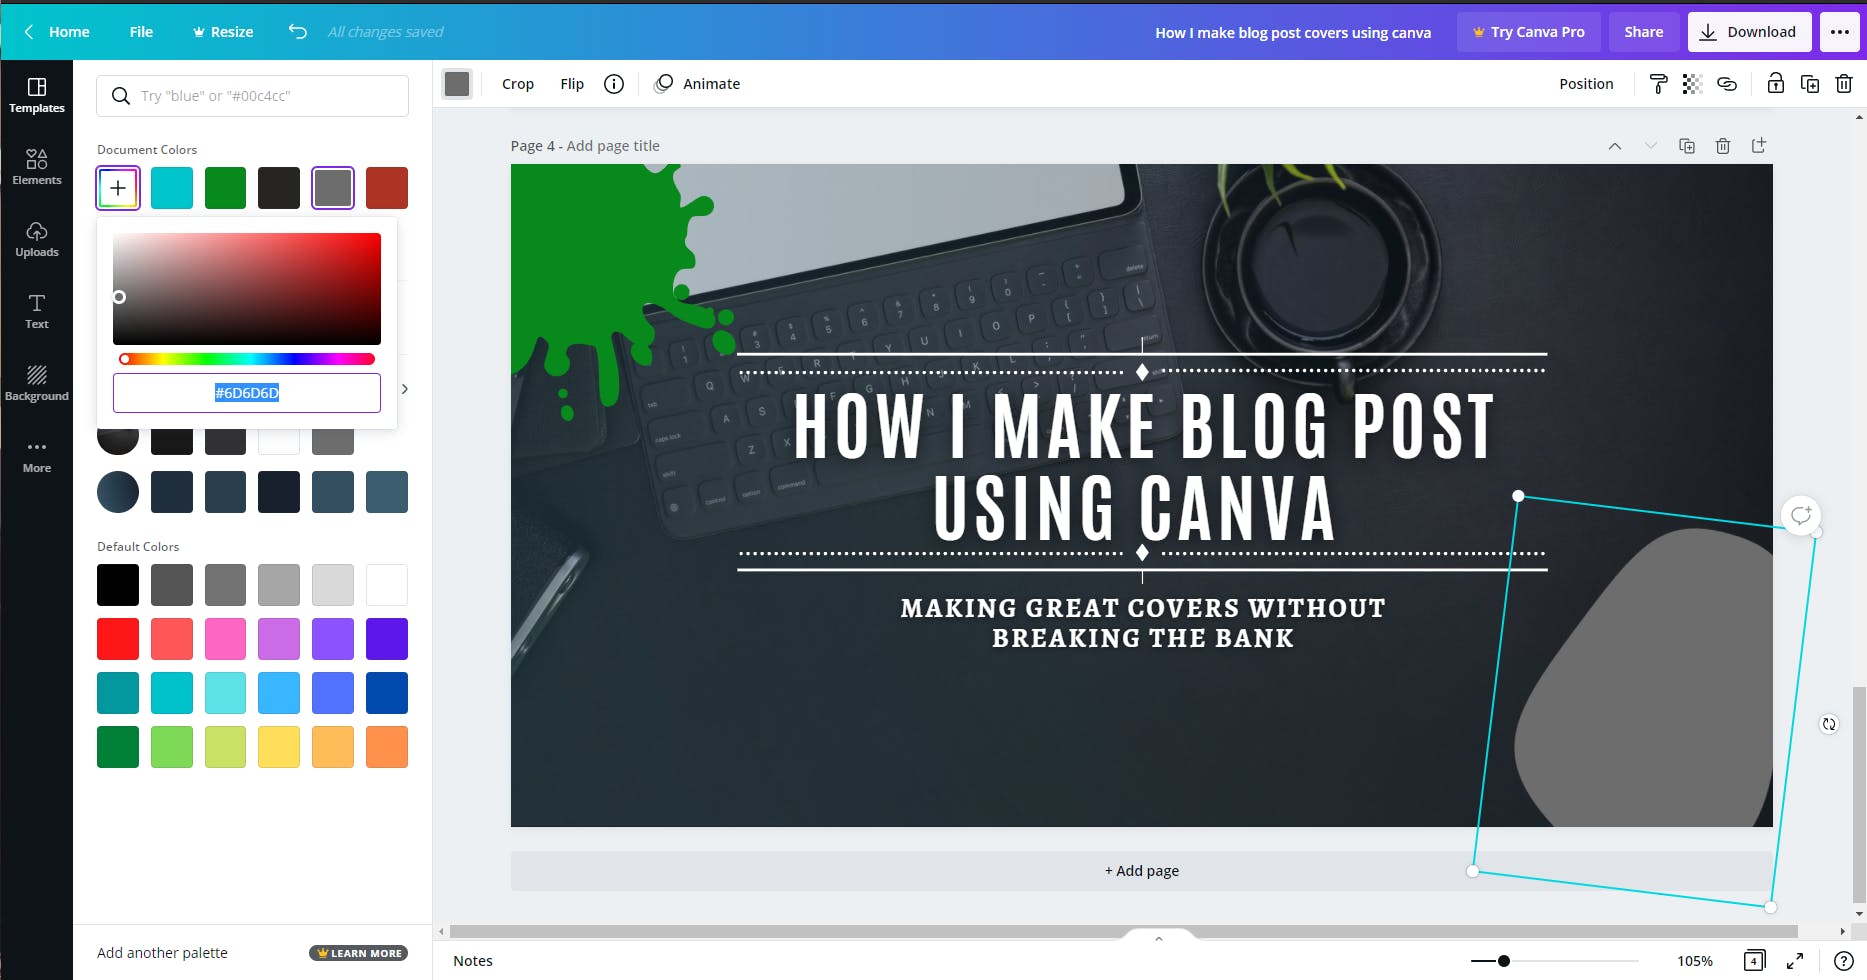
To change the colors you first click on the element you want to change color. Then click on the color button highlighted above.
The color picker window would then appear, where the default colors, as well as some of the colors of the existing elements and photos, would be displayed.
To add your own custom color, you can click the Add new Color button featured above.
STEP 7: Adding my Avatar
You can add your own custom avatar or photo by drag and dropping it directly to the design.
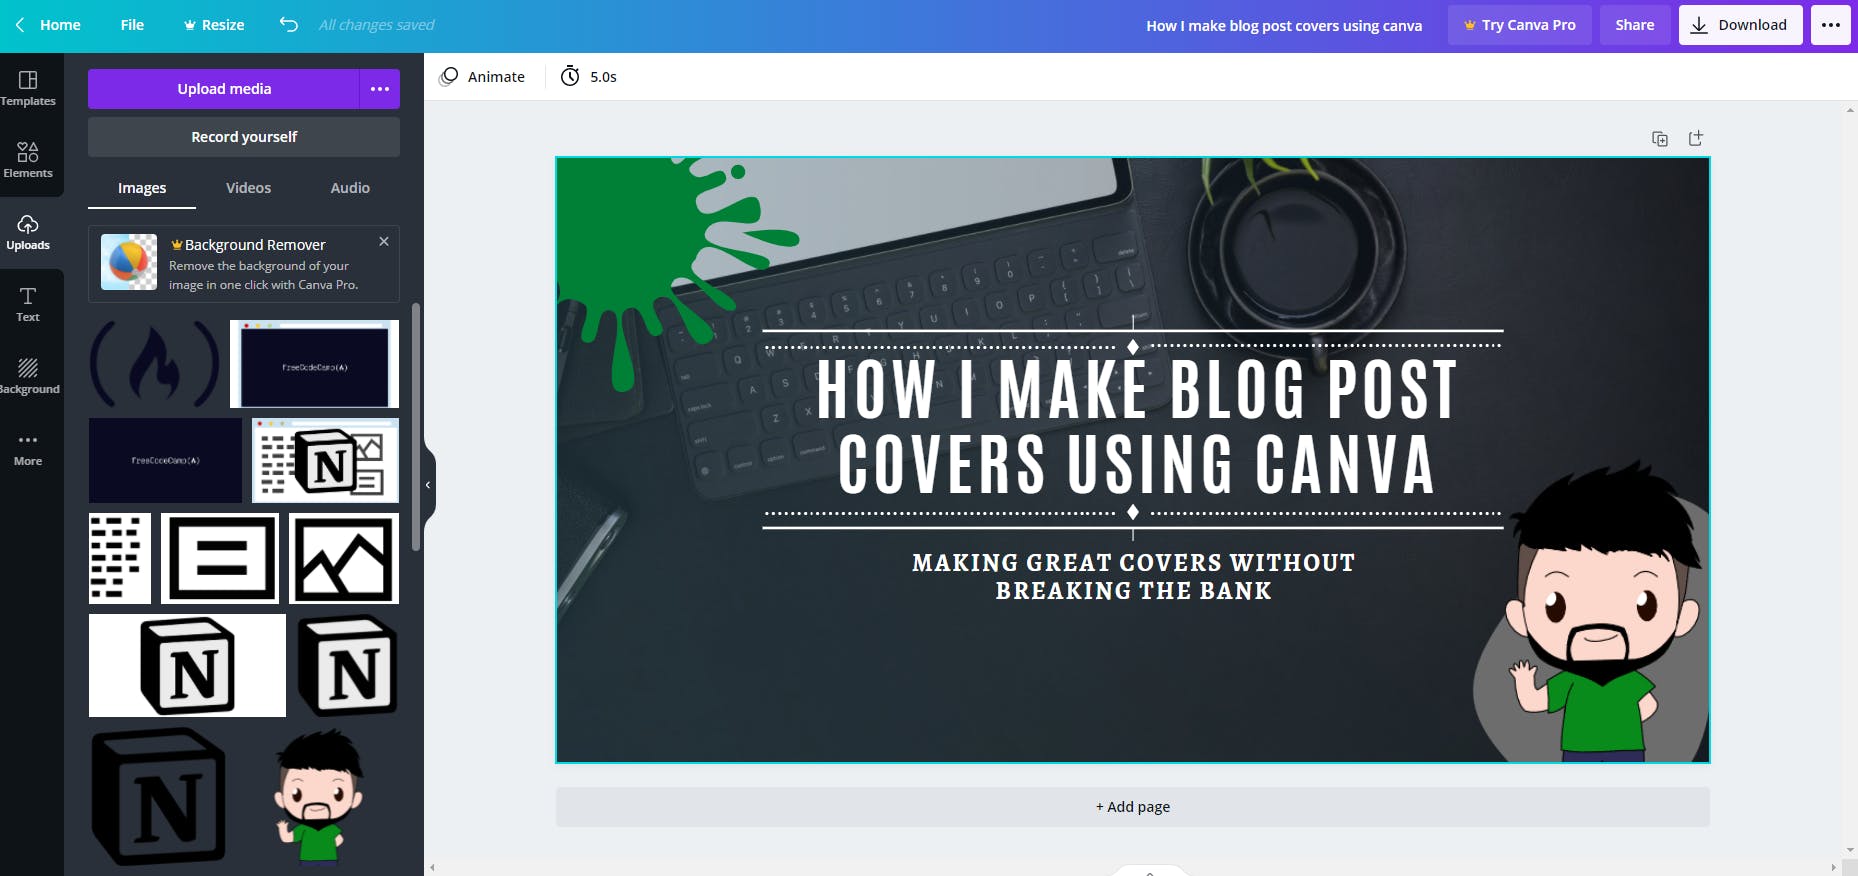
These custom photos can be accessed on the Uploads tab shown above.
STEP 8: Finishing up
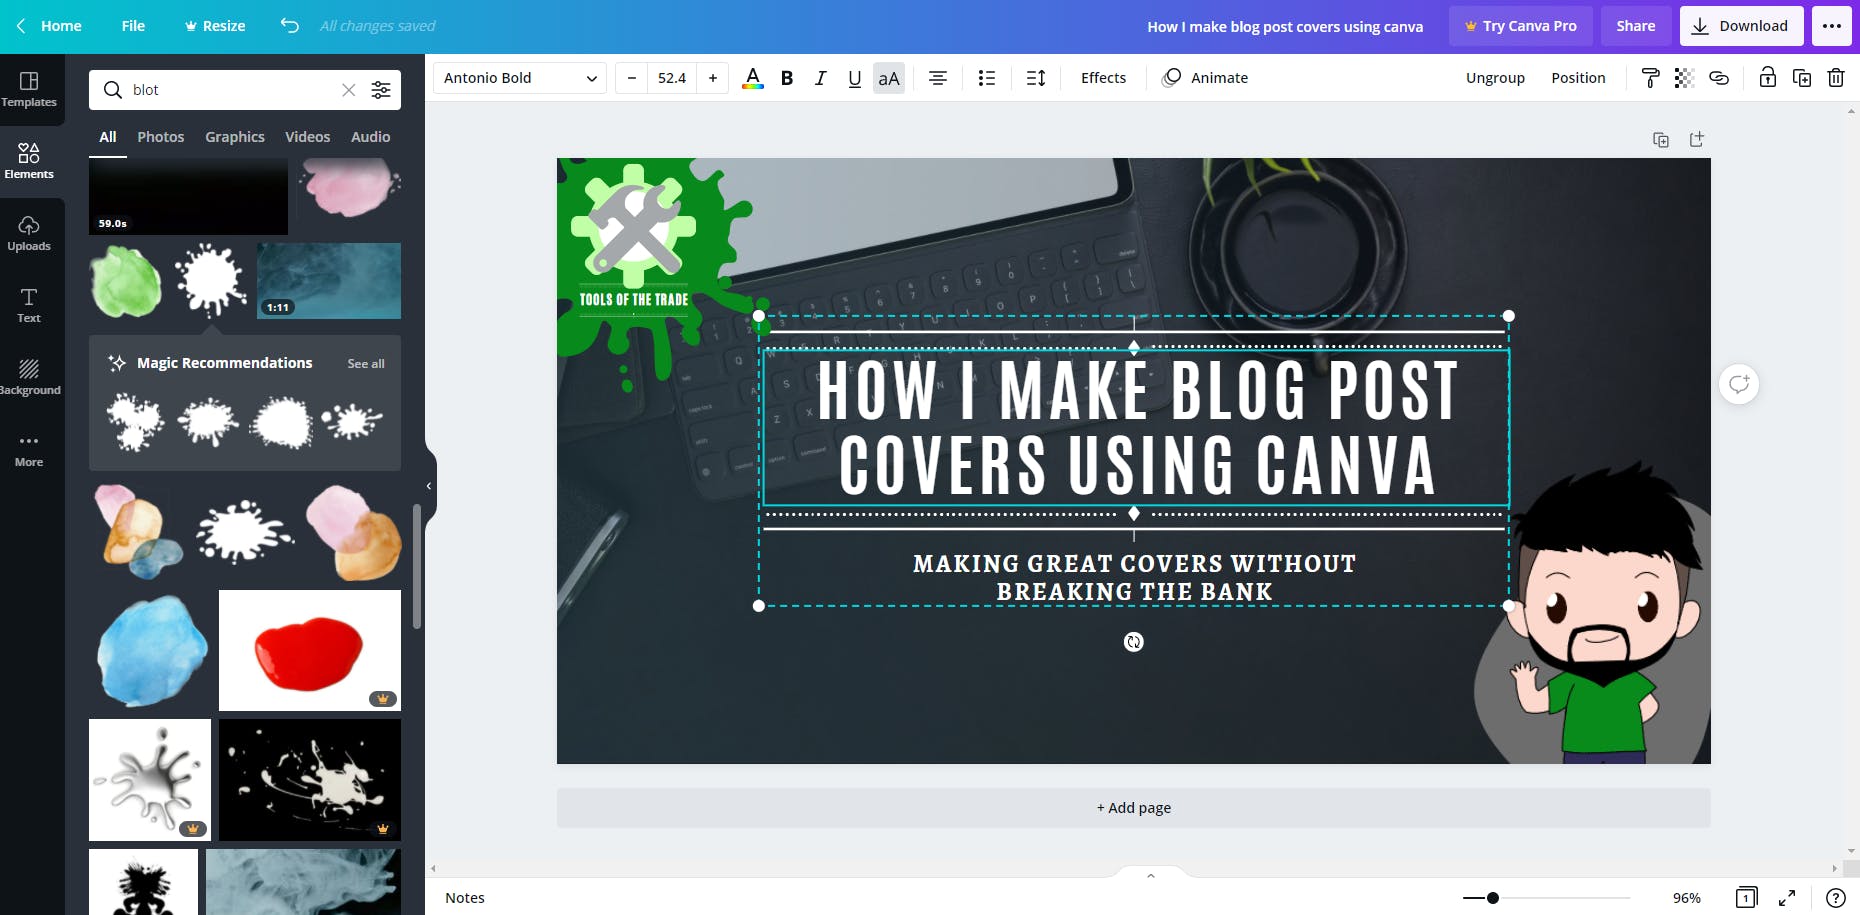
In the desktop version of Canva, you can open multiple designs at the same time and copy elements from one to the other.
Since I'm going to post this as part of my Tools of the Trade Series I wanted to copy the Icon I made there.
And there you have it! That's how I make my Cover photos.
"But wait! That's not the finished cover!", you say?
Well... That's true... But the last 2 steps are purely optional. I only did them because... well... I wanted to 😅
STEP 9: Add the website/ product's logo
Since this will be part of the Tools of the Trade Series, I wanted to incorporate the company logo in my design.
So I searched "Canva" on the elements tab and used the text-only element.
I wanted the circle to be behind all the text that is why I chose that.
Then I duplicated the Title to separate it into 2 parts.
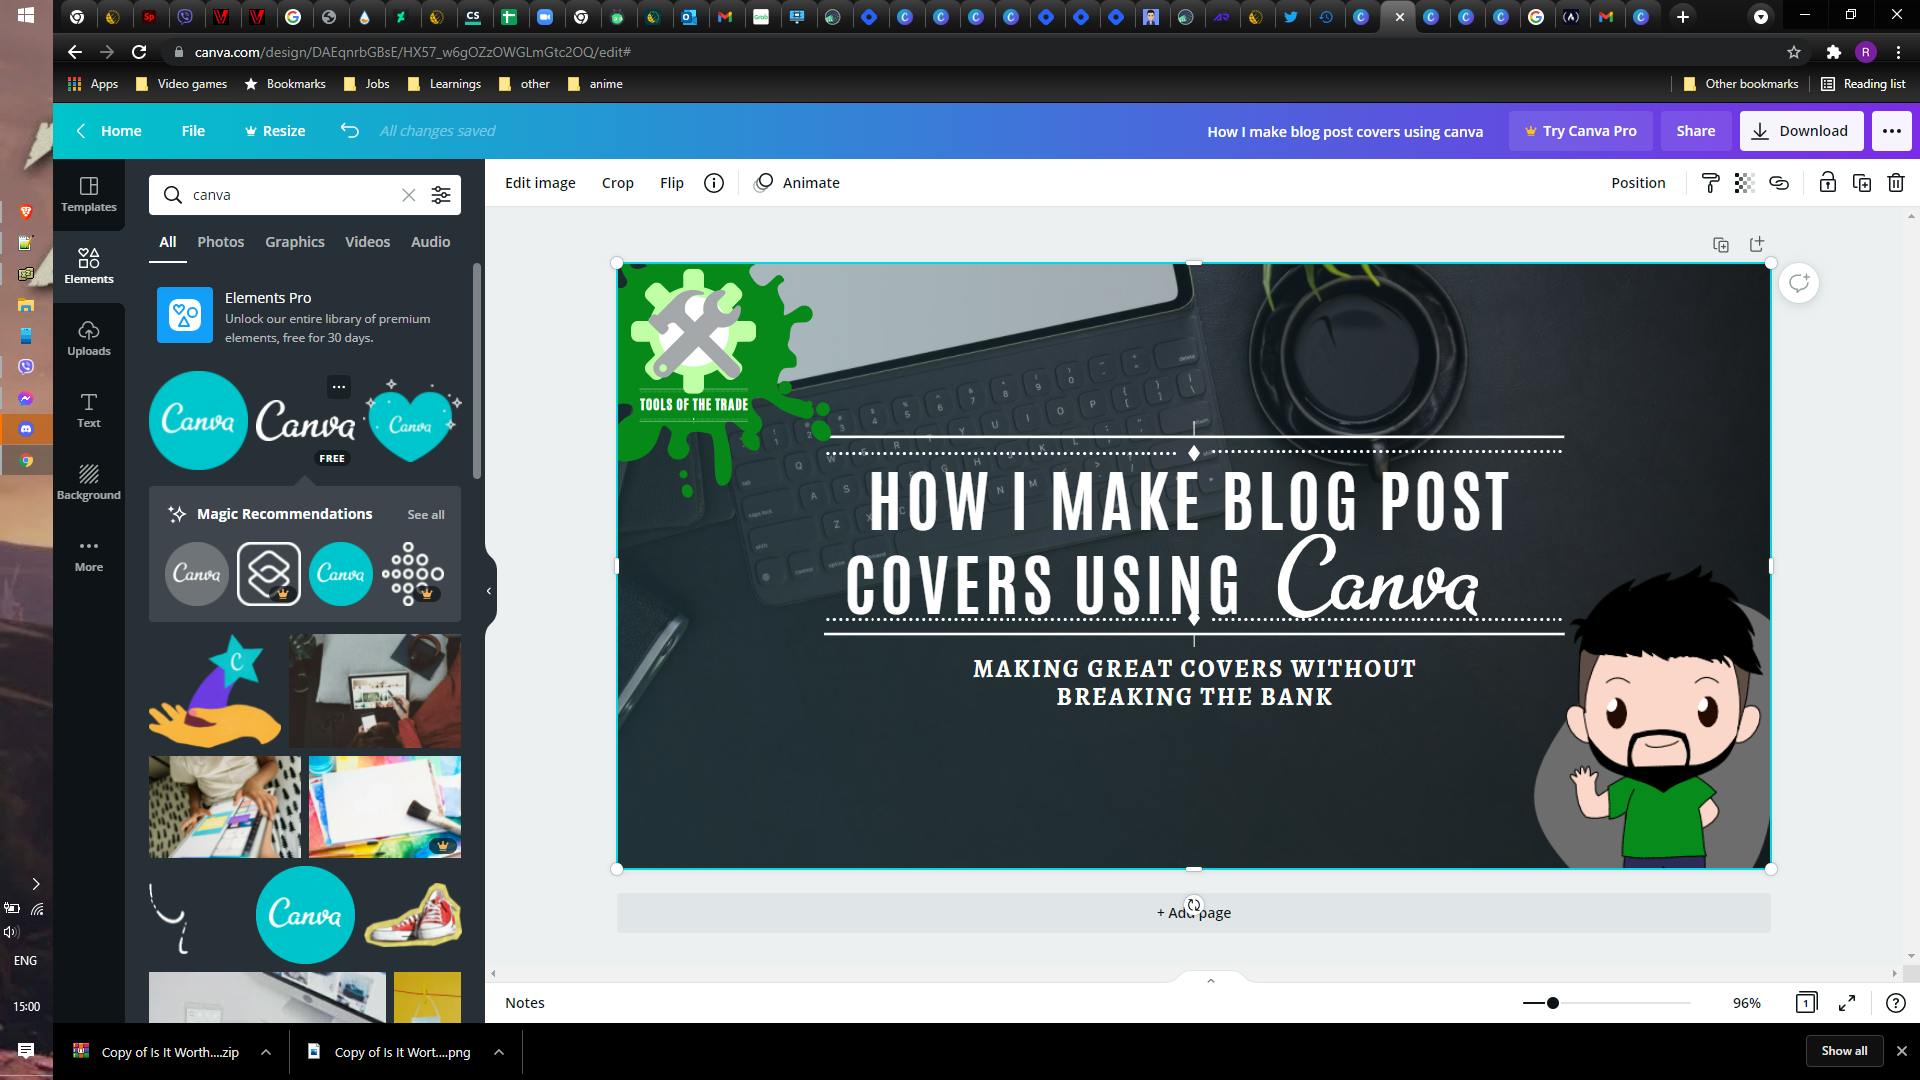
Then I adjusted their positions accordingly to create the format seen above.
Next, I added a circle and changed its color to the brand color.
STEP 10: Text Effects
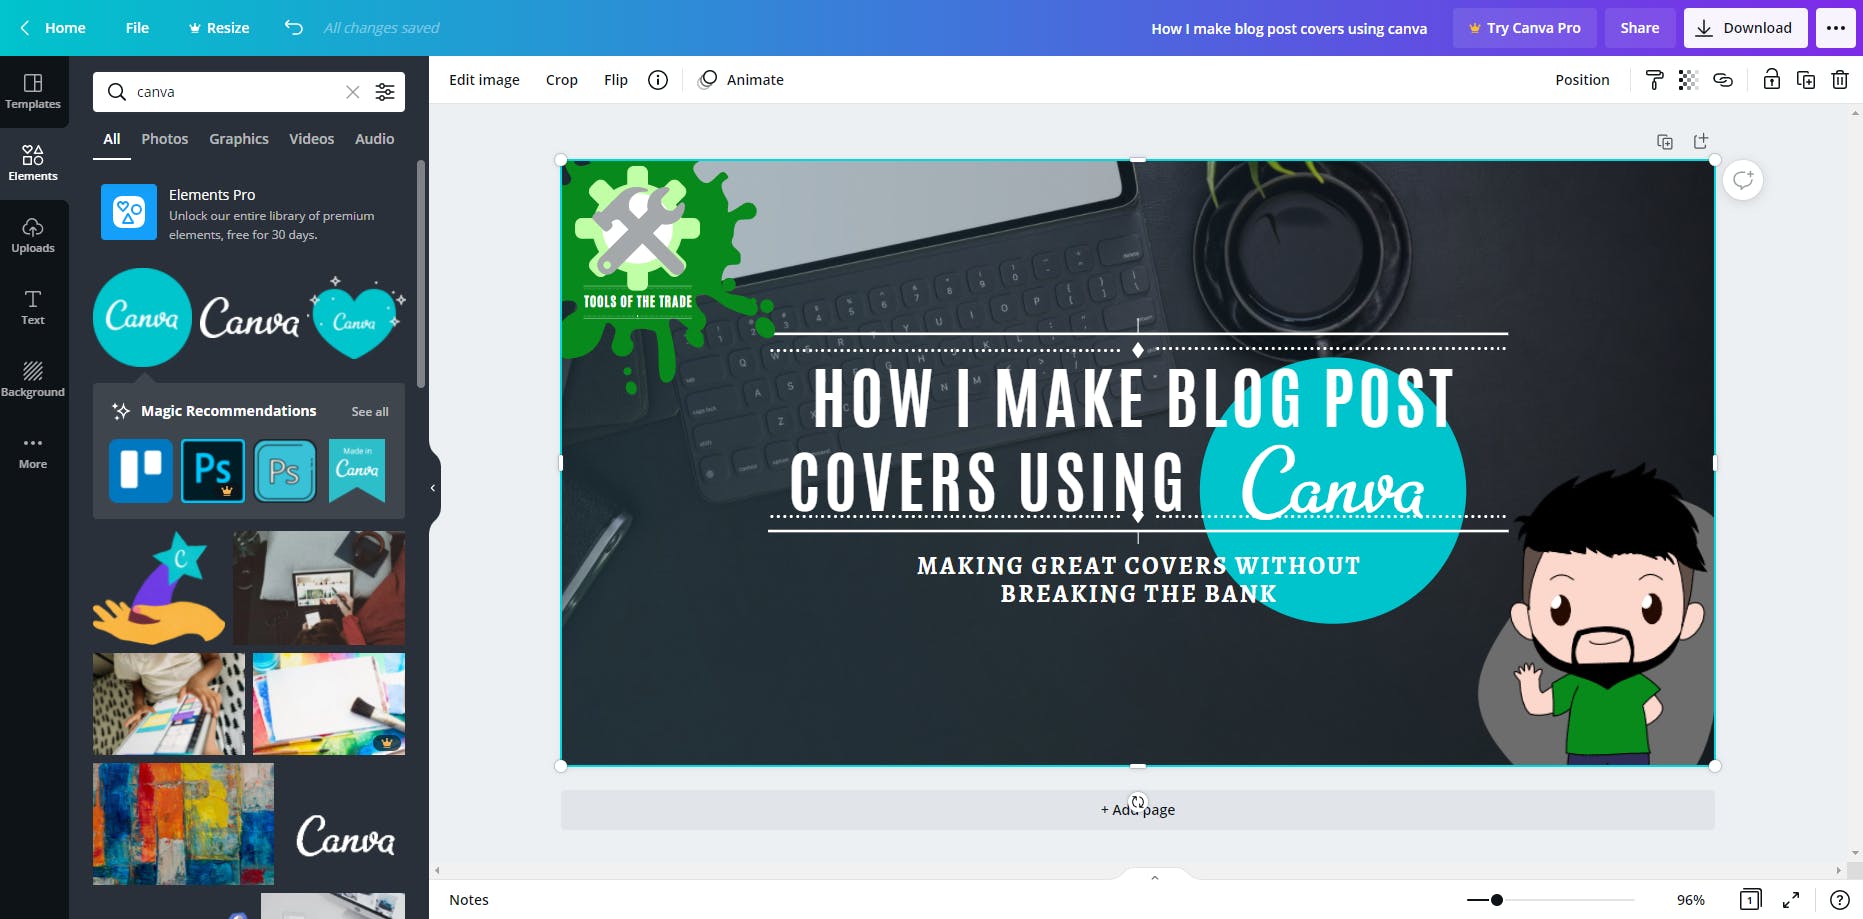
A new feature that Canva implemented is text effects.
As you can see The circle is somewhat clashing with the Title Text.
So I added the lift effect, which adds an outer shadow to the text, making it seem to be floating.
To add the effects, click the text that you want to apply the effect. Then, click the effects button on the Font Panel, and the effects window would open.
The Lift effect gives just enough contrast to the circle. And to finish it off I turned the transparency of the circle down to 69, to give it that muted tone.
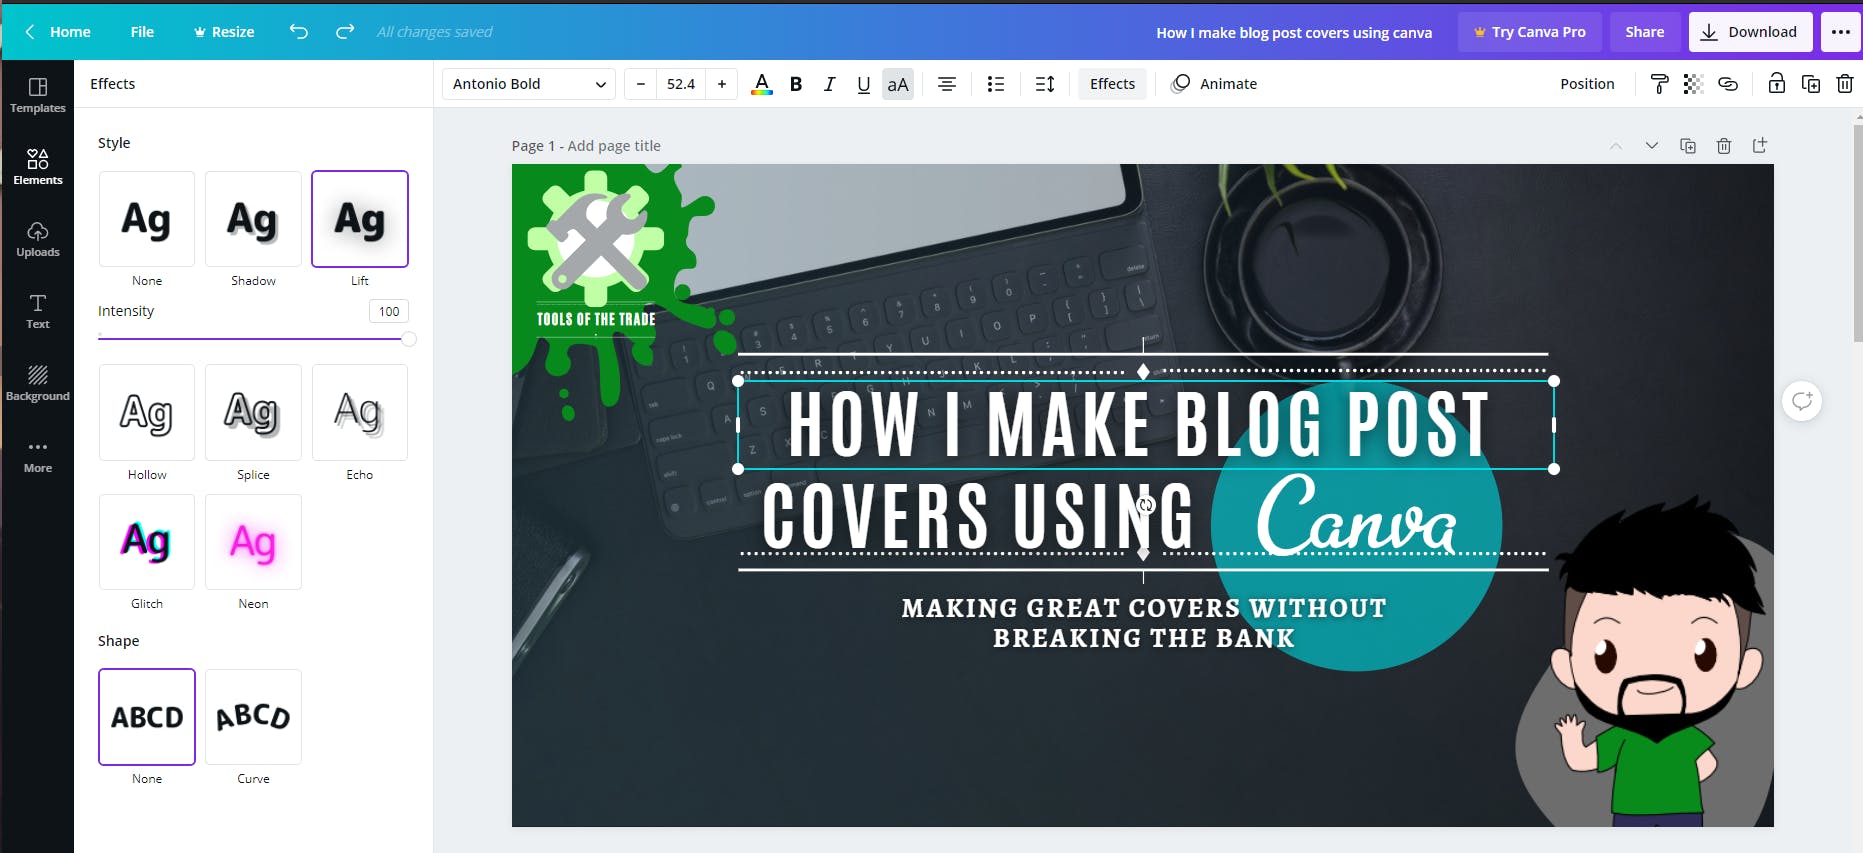
And that's the finished product!
All I need to do now is to click the Download to save my work on my computer.
CONCLUSION
I made this tutorial using a free account so that I can show that you can still make good cover photos even without a subscription.
If ever you choose a template or element with a crown on top of it, that means that is a Pro element and/or template.
Pro Elements are only available with a subscription to Canva. But don't get me wrong I feel that a Subscription is well worth it.
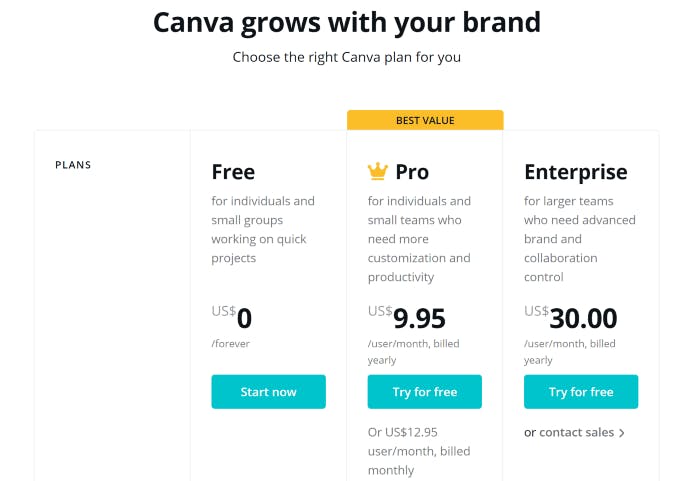
For only $9.95/month, you can unlock the full feature of Canva.
In my opinion, the feature Background Remover, which automatically removes the background from an image, alone makes it a good purchase!
Not to mention the thousands upon thousands of stock photos and elements you can use!
There is also a free 25-day free trial available if you want to try it out. And trust me once you tried the Pro version, there is no going back.
Thank you to Hashnode for the wonderful Bootcamp that keeps on challenging us to write our butts off.
Thank you to our forever supportive host Sam Sycamore who never fails to give us advice
A huge shoutout to the Canva team! Thank you for the added features. I remember having to duplicate text and layer them in an offset to make those effects.
If you have any questions or have anything to add don't hesitate to comment down below and I will do my best to address them there! Thank you!

